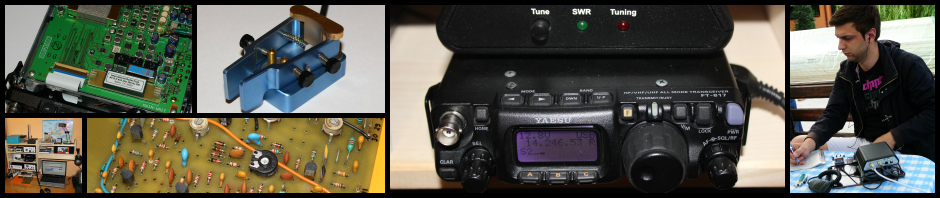
Read first! I am no longer building this transceiver. Please check other interesting projects from Farhan on the discussion group, like HF-1 Transceiver, the replacement of the Minima and some cool RF jigs, Specan and Sweeperino. Also, since I’ve lost from both server and my drive the Eagle files of the PCBs, they will be no more available. Minima has become discontinued, check the group for more details. I will still keep the pdf files here for download for anyone still interested in hacking the rig.
These days I did a little work in Eagle on the PCBs design for Farhan’s new Minima Transceiver. As suggested on the discussion group, I split up in two boards, actually three (one optional) as described:
– one PCB for the LCD, Arduino and Si570;
– the Main Board, with the rest of components;
– an optional small board with the PC serial interface.

Minima’s PCBs split
PCB
Here you can download the pdf file with all the three boards, set as A4 paper format, 1:1 scale. NOTE: the drawings are mirrored, ready to use for Press and Peel PCB making.
Download PCB.
Components Layouts
Downoad Layouts.
Silkscreens
Downoald Silkscreens.
Eagle CAD files Sorry, but the Eagle files are no longer available.
Download CAD archive file.
Some remarks regarding what components are used:
– resistors have 5 mm grid (suitable for 1/4-1/8W miniature resistors, or 1/4 and up, mounted vertically);
– fixed caps have 5 mm grid, electrolytics 2.5 mm;
– capacitors at the crystal filter are SMD 1206;
– relays: SPDT are Omron G5V-1 12V (or cheaper types: RSY-12, RSM957-P-12) and DPDT are Omron G5V-2 12V (cheaper RS-12 etc.);
– for fancy homebrewers, SMA pcb connectors to Si570 and power amplifier/LPFs. Can be omitted, you can simply solder a small coax into the holes;
– TZ03 small type trimmers. Optional holes on the board for three pin small package trim cap.
Good luck homebrewing!
PCB boards revised 31.01.2014
Based on the discussions from Minima group I made a new version of the boards with bigger pads, the holes are now 0.8 mm (1/32″), in some cases 1mm (trimmers, pinhead etc), option for three pins small package trim caps, more ground plane.
Update on 09.04.2014, Errata: the 4k7 resistor from the base of Q23 is missing on both PCBs layouts. You either cut the trace on the main board and drill two holes or place a SMD type, or mount it on the digital board in place of the jumper below the crystal (in this last way, the PTT and R/T pins marked on the silkscreen will be reversed).


It isgreat to see the first pcb design of Minima . all the best and good luck
Thanks Adrian for the PCB design
73
Excellent Work Adrian – Many Thanks
73 Kevin
Thanks Adrian for the PCB design
Great efforts Adrian. You too are as excited about Minima as I am.
Thanks for the great PCBs, Adrian. If you have some time, a PCB layout for the JBOT Amplifier (with the extra stage Farhan mentions in his Minima description) would be really helpful too.
Hi James,
Soon I will add the JBOT with extra stage PCB also.
Nice job. This helps a lot starting to build this exciting transceiver. All the best.
Wonder full job Adrian, it kicked me to start the minima assy,would like to have silk screen
73ss
Good job, already made the MB PCB (iron on using glossy paper) etched and drilled out using a 0.65 mm drill. All fine, no problem with the size.
73 Alan
Dear adrian,
Very Nice work for minima pcb.
Regards,
sudhindra-vu3pwt
Hi Adrian thank for your nice work.
I testing my Minima in RX,i need make the amplifier.
You can see my test in http://www.youtube.com/watch?v=646Ftfhdb3U
Best regards.
Leo / EA7KB
Hi Leo, nice to see the Minima working!
I planned for next week to make the JBOT amplifier PCB, and later, when decided, the LPF+switching board.
73, Adrian
Hi Leo,
Happy to is it working!
All the best
Adrian
hi Adrian,
i was trying to assemble the minima board for Rx as supplied by sandeep. i found that the inductors of the two filter sections of your schematic are having repeat values. This could be due to copy and paste of components while mailing the sch.
I would request you to please changer their values as per Farhan’s schematic or any later values if changed.
next version perhaps you can try to make these transistor pins in line
I generally use NPN or PNP from library and select there TO92-EBC in case of 2n3904 and 3906.
likewise the J310 , i suppose has pins in line as supplied by , say, Farichild. There again we can use some in line device that we get while looking for J310. they are all pin compatible , perhaps.
The final coupling capacitor to speaker appears marked reverse on sch but appears OK on artwork. please have a check
Nice work and service to hamdom
you have been magnanimous in your service.
thanks and special regards
sarma
(only SWL)
From Hyderabad , India
Hi Sarma,
When the Minima schematic is final, as per discussions on the grouplist, and if I will have time then, I will make also a final PCB design taking into account all the remarks of all fellow hams involved.
Adrian
Thanks please, and BEST OF TIMES
Where can we purchase the PCB? 73’s KF5ZNZ
This PCB is not available for sale. If you look on the Minima discussion group, the design, especially the digital circuits, is not yet final, so neither a PCB was introduced to market.
73′ Adrian
Thanks for the quick response, have been following the Bitx and the Minima for awhile now. Just a few things left out that keep me from building both but think that i will be building one or the other soon.
Just a heads up I posted a link over to here from the minima qrp forums I setup. You can find the forum at http://forums.hnetinc.com/
Very FB board. But a question The Schematic showsa 4.7 k resistor in series between the T/R line from pin 5 on the Atmega 328 to the base of Q23. I can not find it on the PC board art work. I have taken an enlarged copy of the board, reversed it and drawn in each component in color. Just bit easier to read than your layout and gets me familiar with the board. I cannot find this resistor. Am I missing somethinG?
Hi Dave, yes that resistor is missing from the PCB.
It was some discussion about it when designing the pcb, I left it out and then I forgot about it.
If you have problems with Tx/Rx switching with the 4k7 you can try 47k, Mine, with 4k7 was always in transmit, probably the uC was sensing there a small impedance and thought that the PTT was pressed. With a 47k one all is working ok.
Adrian
Hi Adrian: Thamks for the fast response. There is lots of room to cut the trace and a 4.7k or 47k.
73
Dave
Yes there is room. Even you can add it on the digital board, instead of that jumper below the crystal. But this was The PTT and Rx/Tx pins notations will be reversed.
I think on mine I will make a small scratch on the main board and add a SMD resistor.
Adrian
Hi there, very nice board! Is the source available in kicad or something, so we can make adjustments? The finished board is good, but no one can do anything except etch one.
Hi Adrian,
I too would be interested in obtaining the .sch & .brd files In Eagle format. My main motivation for this is to reduce the size a little to 10.0 cm x 10.0 cm. so that I can get boards made by Seeed studio or similar and get really high quality boards at a very low price.
It costs no extra to get double sided boards and hence there are quite a few gains to be made in doing so.
I am looking at making this a radio club project.
Hi Lee, on this post here there is a link to the Eagle files. It was always been here 🙂
Hi Adrian,
Silly me! I saw CAD, but I assumed that they were CAM.files. That certainly mafe an “ass out me”
Lee
Nice work Adrian, thank you for designing the PCB. I’ve made all 3 PCB-s using iron and shopping center catalog :). Thank you again!
73! de YU1NIS, Aleksandar
Glad to help Alex.
73s
Liked the grey Parker “51” on one of your photos. 73 de 4Z7DTF.
The link to the Eagle CAD files seems to be broken. Is this mirrored somewhere?
Sorry I have lost the Eagle files data. Please read the first text of the post.
Awesome work! can you please reupload MinimaCAD_revA_31.01.2014.rar file?
Sorry I have lost the Eagle files data. Please read the first text of the post.
Hi Adrian, thanks for the pcb, let me try and let you know, bye, 73’s